How To Use Bootstrap

7:55 AM 0 Comments A+ a-


What is Bootstrap?
Bootstrap is a free front-end framework that includes typography, form, tables, navigation, image design and many other. This framework is easily to use and very useful to make responsive webdesign. Responsive webdesign is a web which automatically adjust their size and performance on all device, so it can be looks good in mobile size until desktop size.

Where to get bootstrap?
You can get bootstrap from:
- open source (bootstrap CDN)
What you need is just to include this jquery below to host a bootstrap from a CDN (Content Delivery Network)


 <!-- CSS -->
<link rel="stylesheet" href="https://maxcdn.bootstrapcdn.com/bootstrap/3.3.7/css/bootstrap.min.css">

<!-- jQuery library -->
<script src="https://ajax.googleapis.com/ajax/libs/jquery/3.1.1/jquery.min.js"></script>

<!-- JavaScript -->
<script src="https://maxcdn.bootstrapcdn.com/bootstrap/3.3.7/js/bootstrap.min.js"></script>

- download bootstrap
You can download bootstrap and host it by yourself. Go to getbootstrap.com to get the latest version of bootstrap.

Create a Webpage Using Bootstrap

There are three things that you need to know in making a webpage using bootstrap:

1. Add HTML5 doctype
 Bootstrap is using HTML5 for all webpage. So, you need to add HTML5 doctype:

<!DOCTYPE html>
<html lang="en">
  <head>
    <meta charset="utf-8">
  </head>
</html>

 2. Add meta tag for mobile responsive
 Bootstrap is support for mobile responsive that called bootstrap3. Add this meta tag in head element to ensure touch zooming and proper rendering:

 <meta name="viewport" content="width=device-width, initial-scale=1">

3. Choose containers
There are two type of basic containers in bootstrap:

- .container: this class provides a responsive fixed container
- .container-fluid: this class provides a full width container

Example of Bootstrap Page
This is a very simple example of webpage that using bootstrap, we hope this can help you get any idea about how to use bootstrap.

 <!DOCTYPE html>
<html lang="en">
<head>
  <title>Bootstrap Example</title>
  <meta charset="utf-8">
  <meta name="viewport" content="width=device-width, initial-scale=1">
  <link rel="stylesheet" href="https://maxcdn.bootstrapcdn.com/bootstrap/3.3.7/css/bootstrap.min.css">
  <script src="https://ajax.googleapis.com/ajax/libs/jquery/3.1.1/jquery.min.js"></script>
  <script src="https://maxcdn.bootstrapcdn.com/bootstrap/3.3.7/js/bootstrap.min.js"></script>
</head>
<body>

<div class="container">
  <h1>Bootstrap Page Example</h1>
  <p>Here is some text that you can put.</p>
</div>

</body>
</html>


Top 5 Computer Cases of November 2016!

11:22 AM 0 Comments A+ a-

Helolo everyone!
So here are the five cases I picked, you may ask "how did I picked these cases?".
Well, (I picked them randomly tbh) I decided based on looks and $$$.
So anyways, let me begin...

At #5 we have the 

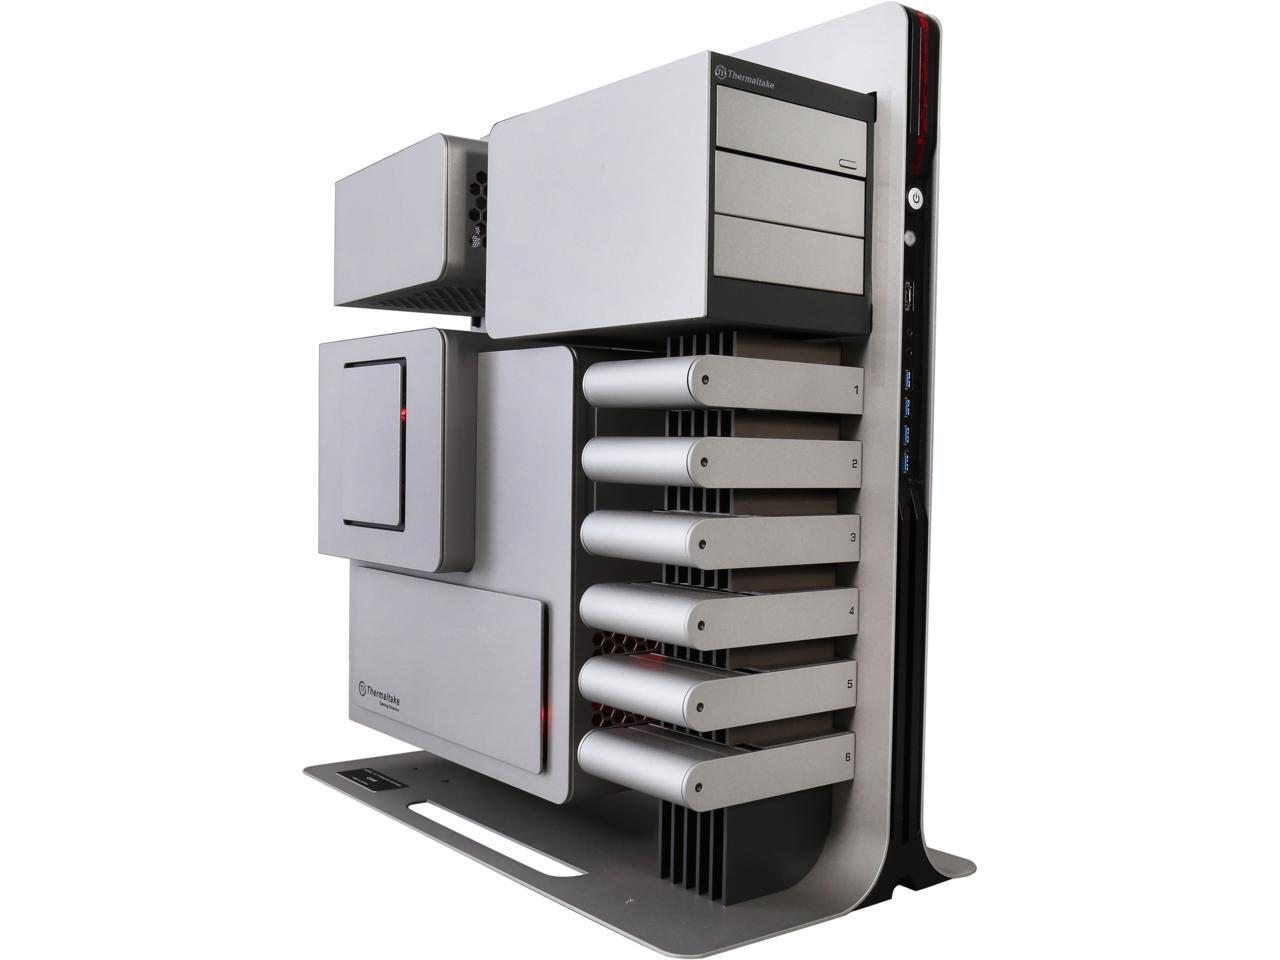
Thermaltake Level 10 Titanium Edition

This case is the WORST case! Not because of its looks(its AWESOME), but because of its price.
I mean.....I could build an entire computer for its price: $1,199.99

  • Aluminum ATX Full Tower
  • USB 3.0 x 4, eSATA x 1, HD Audio x 1 Front Ports
  • Accessible : 3 x 5.25’’ External 5.25" Drive Bays
  • HDD Easy swap : 6 x 3.5’’ or 2.5’’ Internal 3.5" Drive Bays


At #4 we have the

Rosewill GUNGNIR

This is a good case for its price: $54.99
  • Supports 2 x USB 3.0 port and 2 x USB 2.0 port.
  • GUNGNIR comes with 3 pre-installed fans and support up to 5 fans.
  • Translucent Panel with Window.
  • Magnetic Dust Filter. It also comes with dust filters at the front and rear to keep the entire system cool and dust-free.
  • Spacial and Generous Expansion Room: A tremendous PC case has up to 7 PCIe slot to support up to 400 mm Long VGA Card, up to 180 mm High CPU Cooler, up to 280 mm Long Liquid-cooling Radiator on Top and Front. 
  • Motherboard compatibility: Micro ATX / ATX / Mini-ITX. Support 2 x external 5.25" ( tool-free), 3 x internal 3.5", 2 x Internal 2.5" drive bays.


At #3 we have the

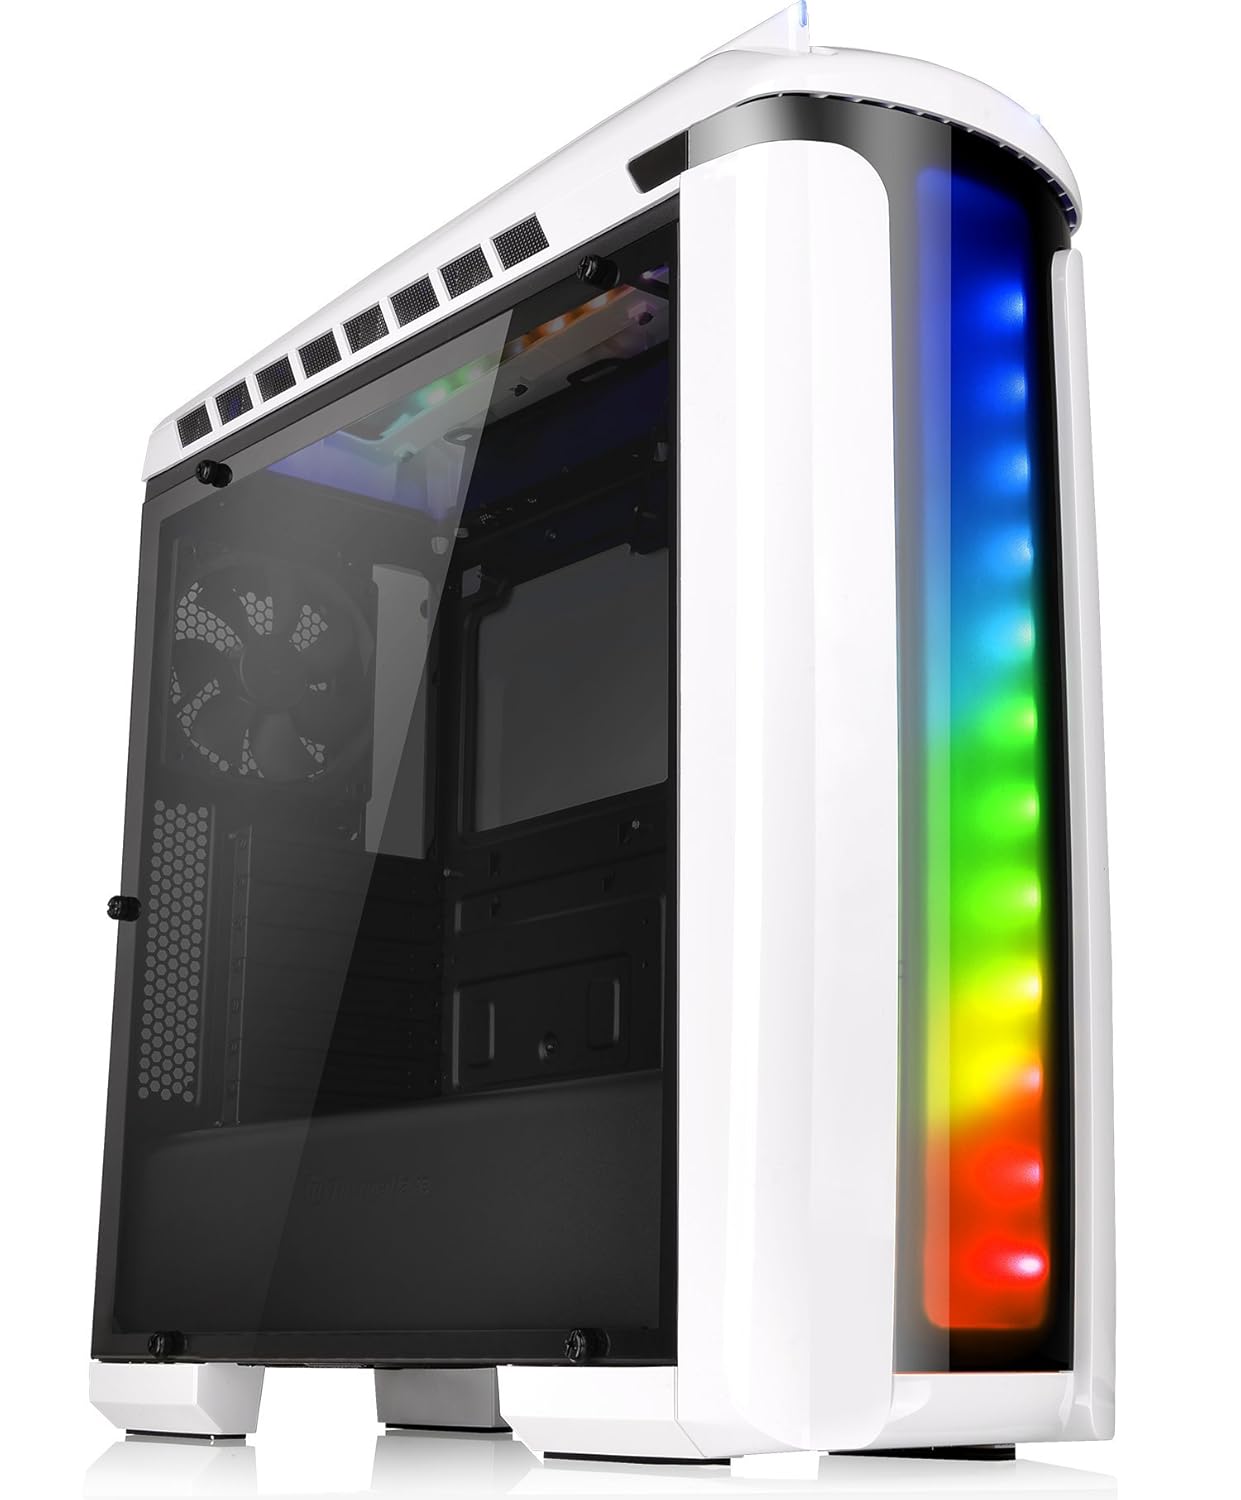
Thermaltake VERSA C22 RGB Snow Edition

Price: $69.99
  • Add Glorious RGB LED lighting options to your Gaming PC with integrated LED zones for the ultimate in lighting customization
  • Front Panel: Supports 2x USB 3.0, 2x USB 3.0 ports, HD Audio ports and LED RGB Control for convent top panel access
  • Take Control of your RGB: Built-in RGB Controller provides 7-Color Options with lighting effects (Breath, Blink and Solid Color) Modes
  • Thermaltake Liquid Cooling Certified: Thermaltake exclusive certification applied to only products that pass the design and hardcore enthusiasts standards
  • Fully Modular Design: Provides multiple configurations and flexibility for custom PC Enthusiast


At #2 we have the

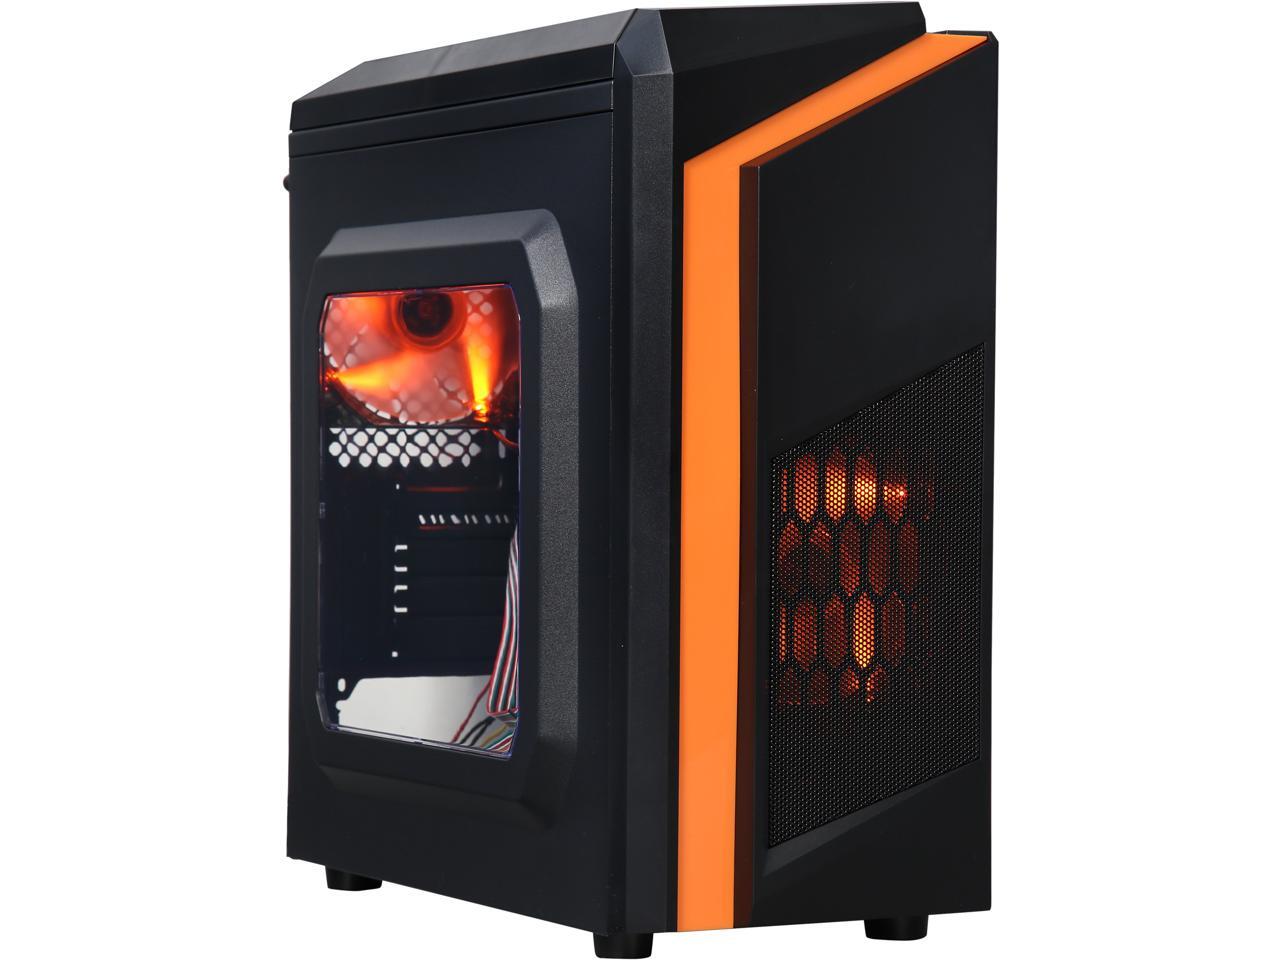
DIYPC DIY-F2-O

Price: $34.99
  • SPCC MicroATX Mini Tower
  • 1 x USB 3.0 / 1 x USB 2.0 / Audio Front Ports
  • 0 External 5.25" Drive Bays
  • 2 Internal 3.5" Drive Bays


At #1 we have the best valued case!

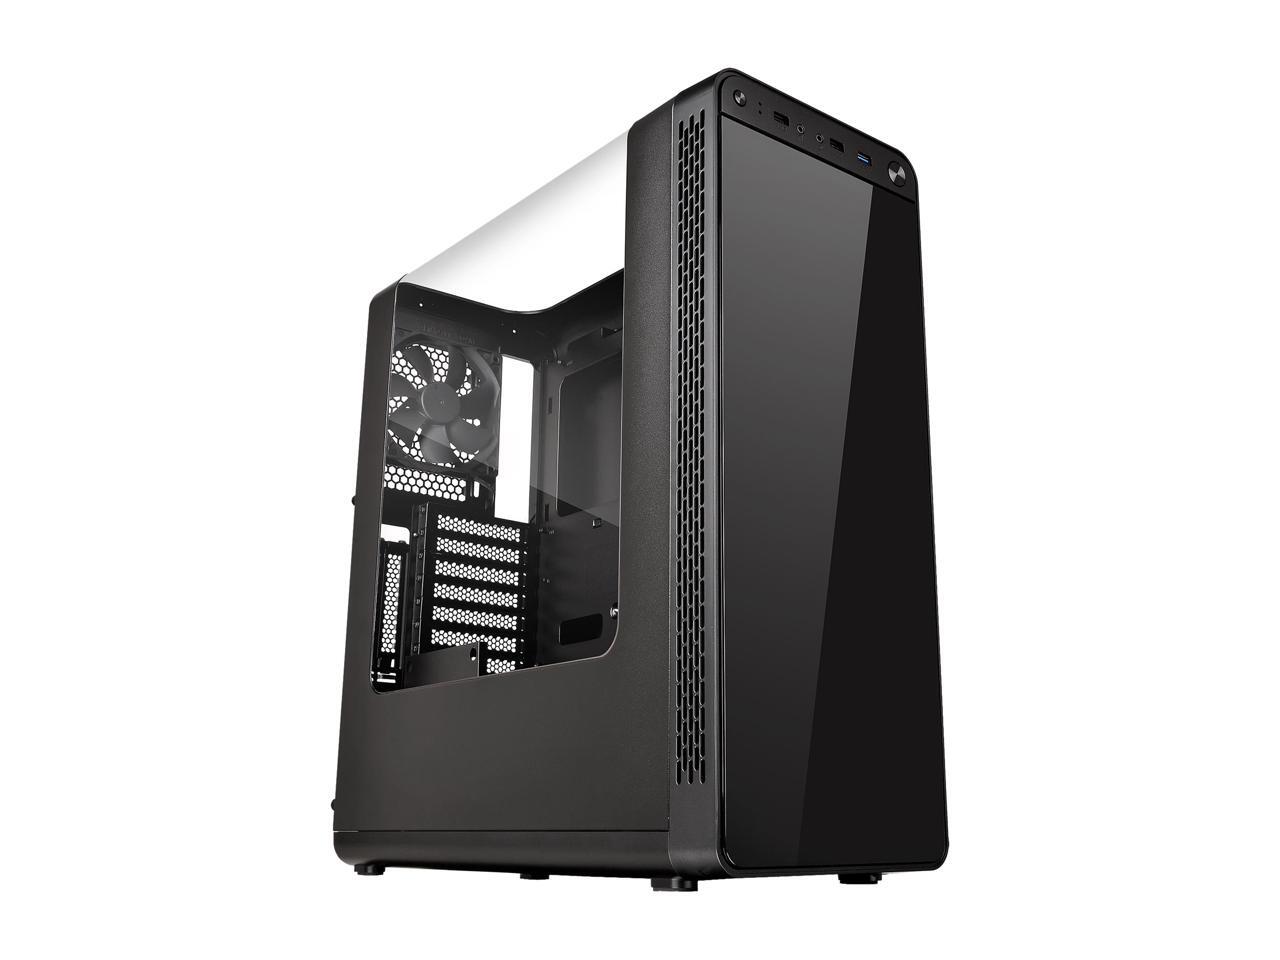
Thermaltake View 27, Gull Wing Window

Price: $79.99

  • SPCC ATX Mid Tower
  • 1 x USB 3.0 / 2 x USB 2.0 / 1 x HD Audio Front Ports
  • 2 x 2.5"/3.5" (HDD Cage) Internal 3.5" Drive Bays
I would say this case gives you the BEST value, because of its "Gull Wing Window" and room for a custom loop!

For more specs on these cases, check the links below. Thanks for reading!


How To Make a Connection Database SQL Server Using C# Based Web

6:54 AM 0 Comments A+ a-

We make a connection into database before we can insert, update, or deleting a query in table. After all, this is the first step to make any change in our database. Before we make a connection code, you must already have the database and its table (we will teach you how to make it later in different post). You need to a web application, if you want to make insert or update code later.

So, if you already have it all, go into code behind and check if your .aspx.cs file has this code on its top:

using System;
using System.Collections.Generic;
using System.Linq;
using System.Web;
using System.Web.UI;
using System.Web.UI.WebControls;
using System.Data;
using System.Data.SqlClient;
using System.Web.Configuration;

Sure, we need data sql client to make a connection into database. If you already has this all code, add connection variables in your public class, like this:

private string connection = WebConfigurationManager.ConnectionStrings["Database"].ConnectionString;

Change the word "Database", as your database name in your web.configuration.
Then create an event for one of your button, so you can insert a query into your database.

protected void btn_Click(object sender, EventArgs e)
{
}

Change the word btn as your button ID. Now, insert all of codes below in the parenthesis of btn_Click
First, you can INSERT/ UPDATE/ DELETE for SQL variables, here we give the example of INSERT code:

string SQL = "INSERT INTO t_mahasiswa (column1,column2) VALUES ('" + txtBox1.Text + "','" + txtBox2.Text + "')";

Change the word column1 and column2 as your table column name, you can the column too as you wish.
Change the word txtBox1 and txtBox2 as your textBox name that you want its value to be inserted into database.

Then add connection and insert code to make a connection into database

SqlConnection conn = new SqlConnection(connection);
SqlCommand comm = new SqlCommand(SQL, conn);

To make all of codes above work, you need to add a trigger,

try
{
conn.Open();
comm.ExecuteNonQuery();

txtBox1.Text = "";
txtBox2.Text = "";
}
catch (Exception)
{
throw;
}
finally
{
conn.Close();
}

Don't forget to change the word txtBox1 and txtBox2 as your txtBox name.